The Settings page holds the choices that apply to your whole store. Open it from the app menu, in your Shopify admin: Sovba: High-Ticket Importer, then Settings.
It has four sections: Components and tabs, Supplier tabs, Product page display and Place components and tabs on your product page.
Components and tabs
The one switch that shows the supplier tabs and the required components on your product pages. Blue while it is off, with the button Turn on components and tabs: your theme editor opens with the switch on, and you click Save there. Green once it is on, with the button Change colors and sizes. See the guide Show tabs and components on your store.

Supplier tabs
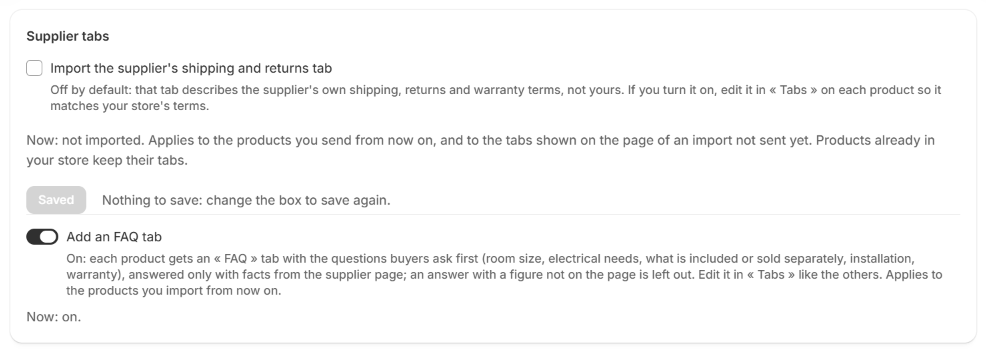
Import the supplier's shipping and returns tab
Many supplier pages have a tab such as Shipping, Returns & Warranty. It describes the supplier's own terms: their delivery times, their return policy, their warranty process. These are not your store's terms.
So this tab is not copied by default. The other tabs are.
To copy it:
- Tick Import the supplier's shipping and returns tab.
- Click Save. The button then reads Saved, and the line under the box says Now: imported.
When the box is ticked, the shipping tab is copied in the same place as on the supplier page. Its links are left out.
If you turn it on, edit the tab on each product so it matches your store's terms. See the guide Edit the supplier tabs.
| Product | Effect of the setting |
|---|---|
| Products you send from now on | Yes |
| Imports not sent yet | Yes, the tabs shown on their page follow the setting |
| Products already in your store | No, they keep their tabs |
To add or remove the shipping tab on a product already in your store, edit its tabs in the app.
Add an FAQ tab
On by default. Each product gets an FAQ tab with the questions buyers ask first: room size, electrical needs, what is included or sold separately, installation, warranty. The answers only use facts from the supplier page: an answer with a figure that is not on the page is left out. You edit it in Tabs, like the other tabs.
The switch is saved as soon as you click it, and applies to the products you import from now on.
Product page display
How the required components and the description show on your product pages, and whether the blocks you placed yourself are used. Each switch is saved as soon as you click it. Your product pages show the change within a minute: reload the page if you do not see it yet.
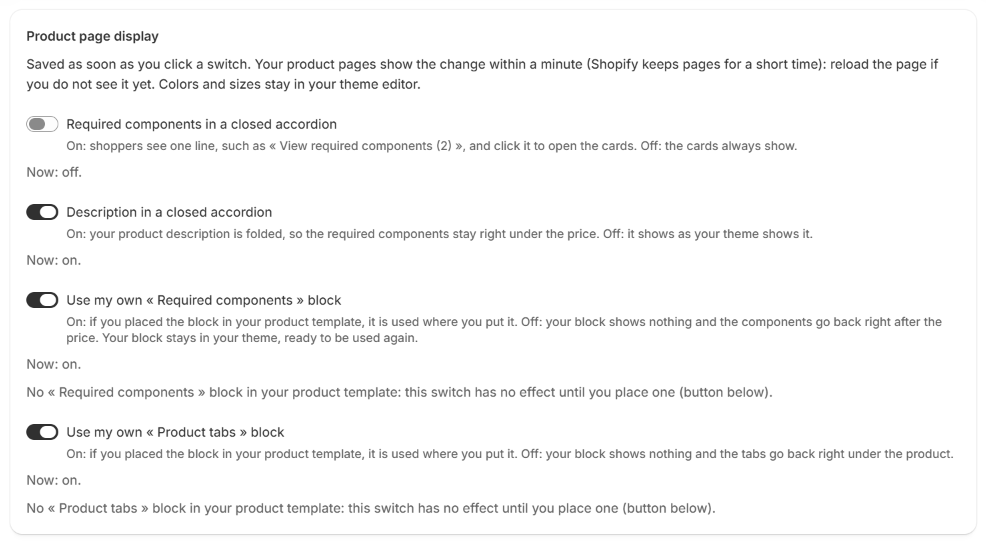
| Switch | Default | On |
|---|---|---|
| Required components in a closed accordion | Off | Shoppers see one line, such as View required components (2), and click it to open the cards |
| Description in a closed accordion | On | Your product description is folded, so the required components stay right under the price |
| Use my own « Required components » block | On | A block you placed in your product template is used where you put it |
| Use my own « Product tabs » block | On | A block you placed is used where you put it |
Under each Use my own switch, the app says how many of these blocks are placed in your product template. Turn a Use my own switch off to go back to the automatic placement, without opening your theme editor. See the guide Show tabs and components on your store.
Place components and tabs on your product page
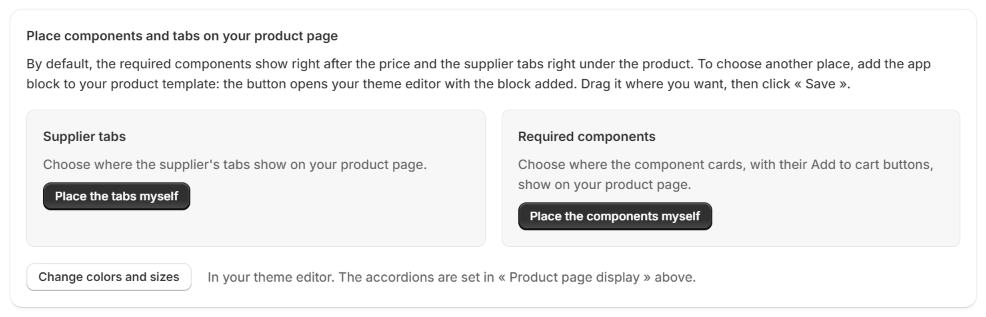
By default, Components and tabs places the required components right after the price and the supplier tabs right under the product. To choose another place:
- Two cards show: Supplier tabs and Required components. Click Place the tabs myself or Place the components myself. Your theme editor opens on your product template, with the block already added.
- Drag the block where you want it, then click Save in the theme editor.
Your block is then used instead of the automatic placement.
A card shows a green Placed badge instead of its button when its block is already in your product template, with a link Open your theme editor to move it. If you remove the block, the button comes back the next time you open Settings.
The button Change colors and sizes, under the cards, opens their colors and sizes in your theme editor.
Good to know
- The Save button tells you where you are. It reads Save when you have a change to save, and Saved, greyed out, when there is nothing new. The line next to it says why.
- Warranty: when the supplier's shipping tab also holds a real warranty text and the box is not ticked, the app keeps that warranty text as a separate Warranty tab. When the box is ticked, the warranty stays inside the shipping tab.