Sovba: High-Ticket Importer copies a product page from your supplier's website into your Shopify store. It copies the tabs, tables, variants, prices, SKUs, photos, videos and documents. Then it improves the title, the short description and the Google texts, and chooses the product category.
Nothing reaches your store until you have reviewed it. The product is sent as a draft, hidden from shoppers until you make it active.
Before you start
- Install the app in your store, and choose a plan. Your 7-day free trial includes 5 imports. See the guide Your plan and imports.
- Import only products you are authorized to sell: as a dealer, a distributor or a dropshipper of that supplier.
- Get the link of the product page on your supplier's website, for example
https://www.supplier.com/products/sauna-heater-8kw. It must be the page of one product, not a category or search page. - Prices and SKUs are copied exactly as the supplier shows them to the public. The app never changes them. Your selling price is yours to set.
- Turn on Components and tabs, so the supplier tabs and the required components show on your product pages. A blue box at the top of the New import page does it in two clicks. See the guide Show tabs and components on your store.
- Decide whether you want the supplier's shipping tab. The supplier's Shipping or Shipping, Returns & Warranty tab is not copied by default, because it describes the supplier's own terms, not yours. You can turn it on in Settings. See the guide Settings.
Step 1. Open the app
In your Shopify admin, click Apps, then Sovba: High-Ticket Importer. The app menu has four pages:
| Page | What you do there |
|---|---|
| New import | Paste supplier links, and find what is waiting for you |
| Imports | Every import, sent or not, by status or by name |
| Supplier changes | What changed at your suppliers since you imported: prices, stock, retired products. See the guide Monitor your suppliers |
| Settings | The choices for your whole store |
The New import page opens first.
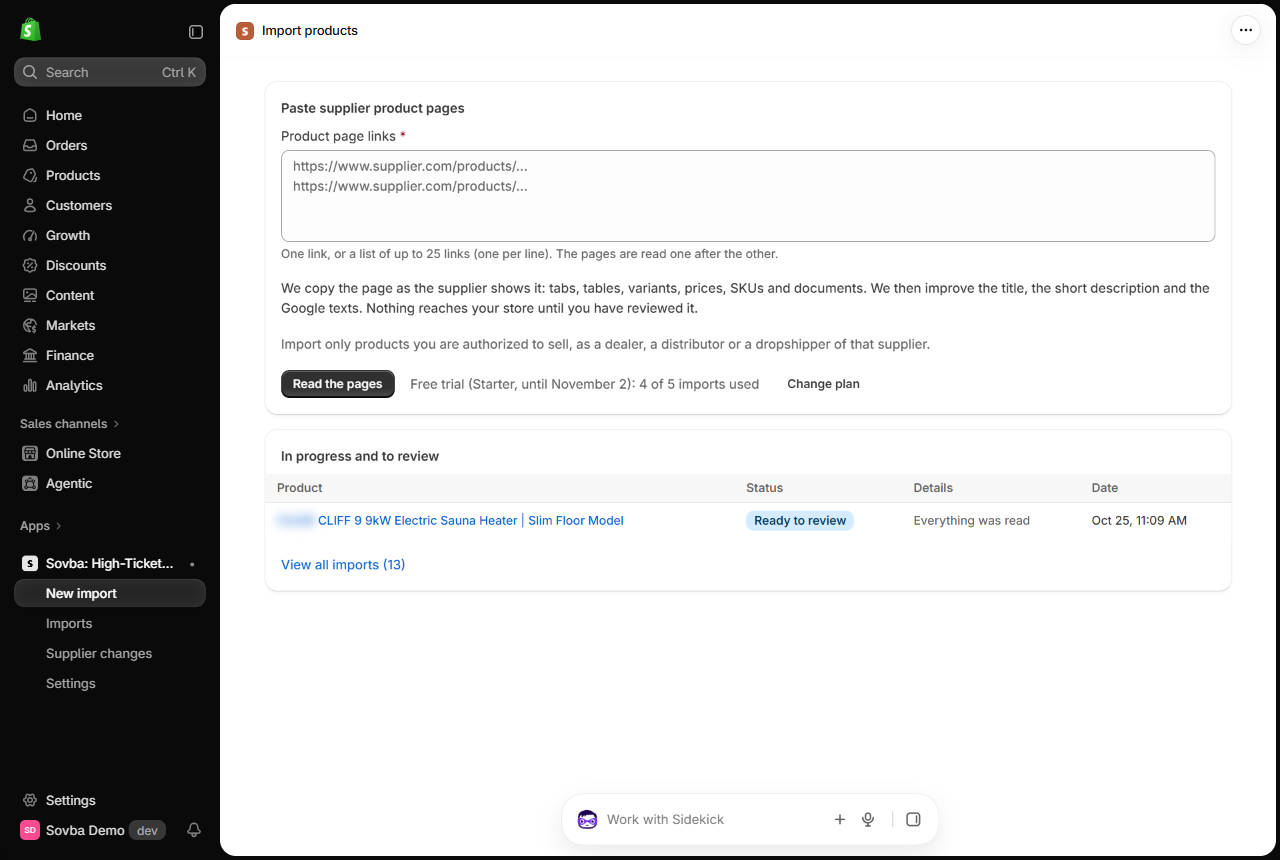
Step 2. Paste one link, or a list
- Paste the link in Product page links. You can paste up to 25 links at once, one per line.
- Click Read the pages.
A green message says how many pages are being read. Under the button, your plan shows how many imports you have used.
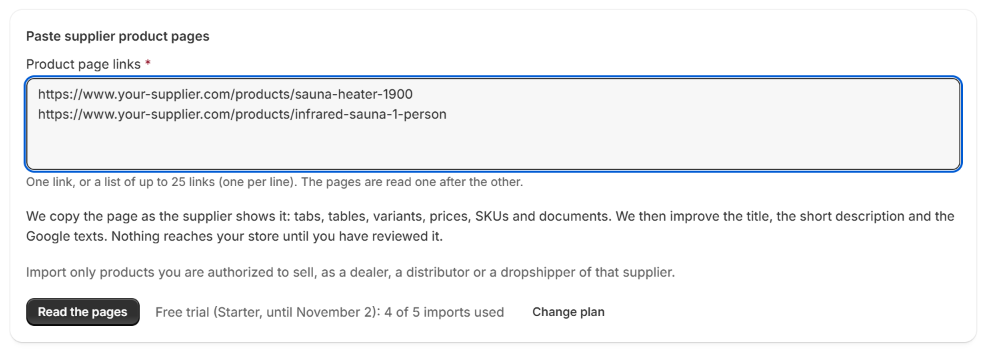
The app leaves out what it should not read, and says so:
- A link you already imported is not read again. An orange box shows it, with a link to the existing import and its date. Open it to review or send it. If you really want a new reading, click Read again anyway: it counts as a new import of your plan.
- A link pasted twice in the same list is read once.
- A line that is not a link is skipped.
- More links than your plan has left: the app reads what your plan allows and tells you how many were not read.
Step 3. Wait for the reading
The pages are read one after the other. The section In progress and to review shows each one, and its Details column says what the app is doing:
- Opening the supplier page
- Finding the product sections
- Copying the content
- Reading variants and prices
- Writing the title and descriptions
For a product sold in several variants (sizes, finishes, fuel types...), Comparing the variants may also appear. It happens when the supplier's website runs on Shopify: the app opens the supplier page for two or three variants and compares them. A line that differs from one variant to another, such as a weight or a part number, is left out of the tabs, because it would only be right for one variant. An alert lists those lines, so you can add them back if you need them.
You can leave the page while the app reads. The list refreshes on its own. The other pages show Waiting for the previous reading until their turn comes.
When a reading ends, its status changes:
| Status | What it means |
|---|---|
| Ready to review | Everything was read. Open the import to check it. |
| Review alerts | Some points need your attention before sending. The Details column says how many. |
| Not read | The page could not be read. The reason is shown next to it. Check the link and try again. |
| Sent as draft | The product is in your store, as a draft. |
In progress and to review only keeps what needs you: readings in progress, products read but not sent yet, and the readings that failed this week. The products you sent are on the Imports page.

Step 4. Review the product
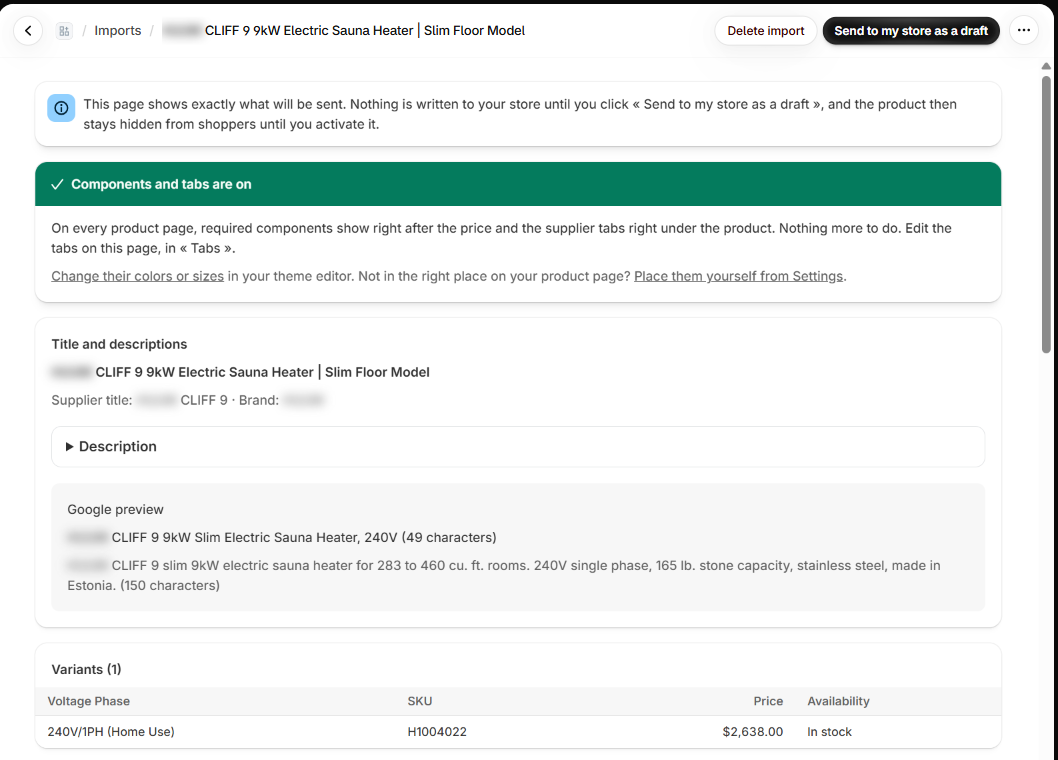
Click the product name or its status. This page shows exactly what will be sent:
- Points to check before sending (yellow box, if any): read each point. For example, a price that is not on the supplier page.
- Title and descriptions: the title written by the app, with the supplier's title and the brand under it. Click Description to open the short description and the key facts. Under it, the Google preview shows the title and description written for search results.
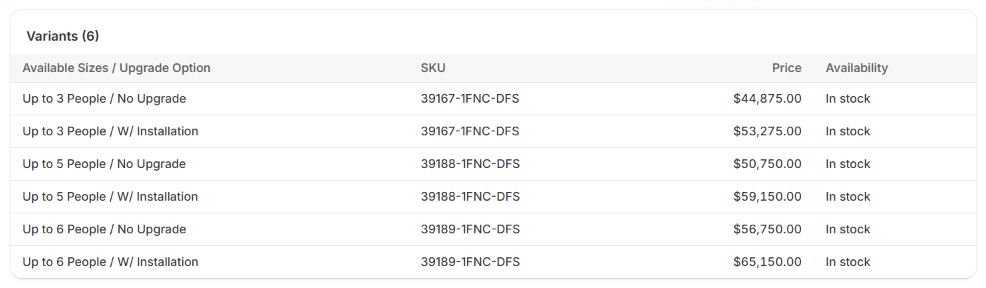
- Variants: every option (size, color, finish) with its own price and SKU, as the supplier shows them.
- Tabs: the supplier's tabs, as they will show under your product, and an FAQ tab written from the supplier's facts (you can turn it off in Settings). Click a tab to open it and change its text. See the guide Edit the supplier tabs. No shipping tab? It is left out until you turn it on in Settings.
- Required components (if any): the parts the product needs to work, such as heater stones or a control unit. See the guide Required components.
- Images: the photos that will go into your product gallery.
- Source: the supplier page the product comes from.
A product sold in several variants shows each one with its price:
Step 5. Send it to your store
Click Send to my store as a draft, at the top of the page.
Sending takes up to a minute: the app copies the documents into your store's files, then creates the product with its category. A green box confirms Sent to your store as a draft.
If a yellow box Sent, with points to check appears, read it. It tells you what to finish in Shopify. For example:
- No price was found on the supplier page: the product shows as Sold out so nobody can buy it at $0.00. Enter your price, then turn off Inventory tracked (or add stock) on the product page in Shopify. See the guide Products without a price.
- Colour swatches added: the colour buttons show a photo of each finish. See the guide Colour swatches.
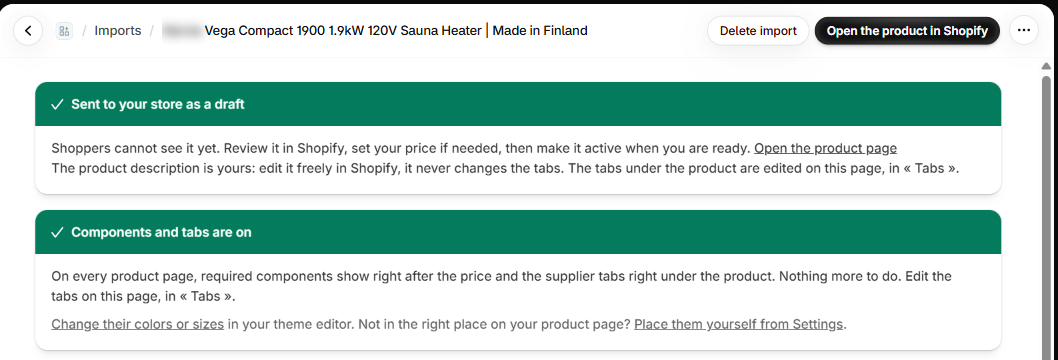
Step 6. Check it in Shopify and make it active
- Click Open the product in Shopify.
- Check the product page: photos, price, variants, category.
- Set your selling price if needed.
- When you are ready, change the Status from Draft to Active, then click Save.
The product is now visible on your store.
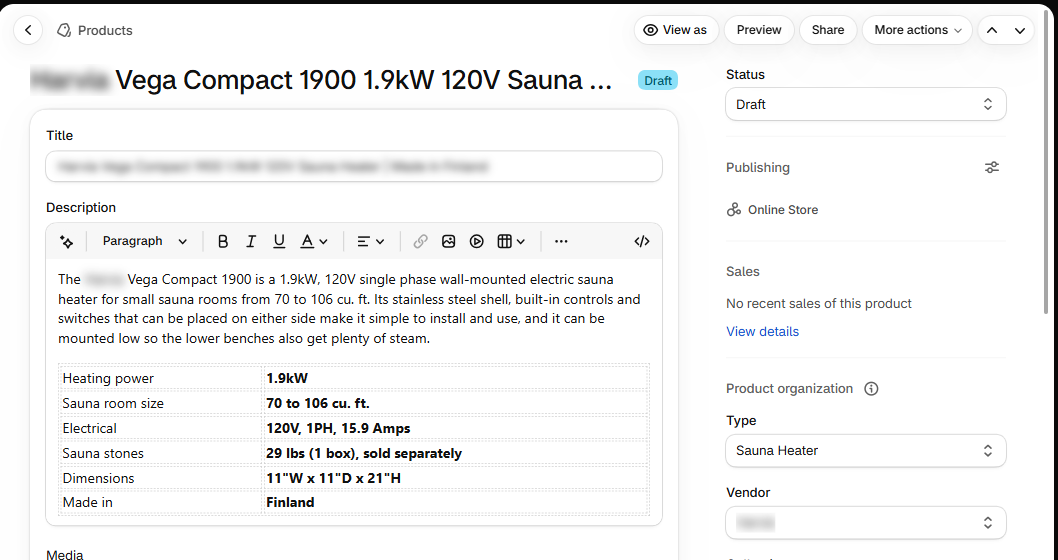
From now on, the app checks the product's supplier page every week and tells you, in Supplier changes, if a price, a variant, the stock or a document changes. See the guide Monitor your suppliers.
Find an import later
Open Imports in the app menu. Every import is there, 25 per page:
- the buttons All, To review, Sent and Not read show each status, with its number;
- Search finds an import by product name or by link. Clear search shows the whole list again.
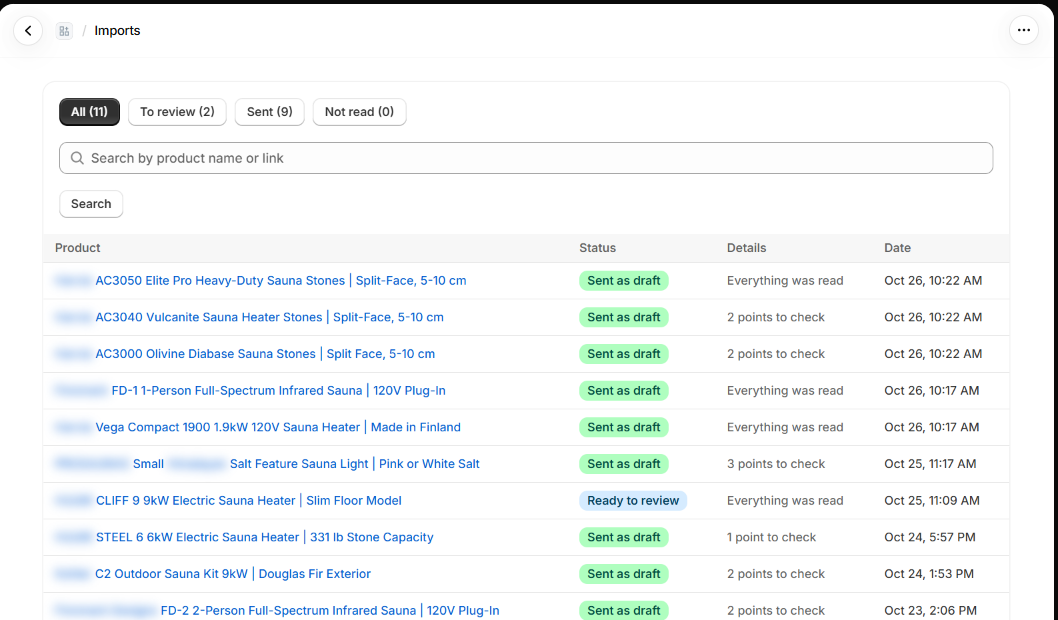
To delete an import, open it and click Delete import at the top of the page, then confirm. The import leaves the app's lists. A product you already sent stays in your store, unchanged. A deleted import still counts in your plan for the current billing cycle.
Good to know
- Each import is sent once. After sending, the main button becomes Open the product in Shopify.
- The product description is yours. Edit it freely in Shopify: it never changes the tabs. The tabs are edited in the app, in Tabs.
- Tabs and components on your product page: they appear once Components and tabs is turned on in your theme. The app shows a blue box with the button Turn on components and tabs, on the New import page and in Settings, until you do it. See the guide Show tabs and components on your store.
- To check your product as a shopper sees it, open your store in a private window. The View button in the admin shows a preview, which can differ from what shoppers see.